How to record your own yoga videos and offer them for sale
7Last week we discussed offering your yoga services via video conferencing and live streaming. Another way to sell your yoga services virtually is via prerecorded yoga content. If you decide to offer prerecorded yoga content, you would record yourself demonstrating a yoga class with a video camera or your phone, edit it and make it available to students on YouTube or Vimeo via a private link. This option is a bit more labor-intensive on your part, but this content will be “ever-green”, meaning that you would be able to sell it to people over and over.
Setting up a full blown virtual yoga studio is time-consuming and labor-intensive. There are many details that go into selling yoga videos online, so you would need to acquire some new skills or pay other people to set them up for you. Today we will focus on how to do it yourself, right now, with minimal equipment and minimal financial investment. It’s a great place to start to see whether or not you want to go that route.
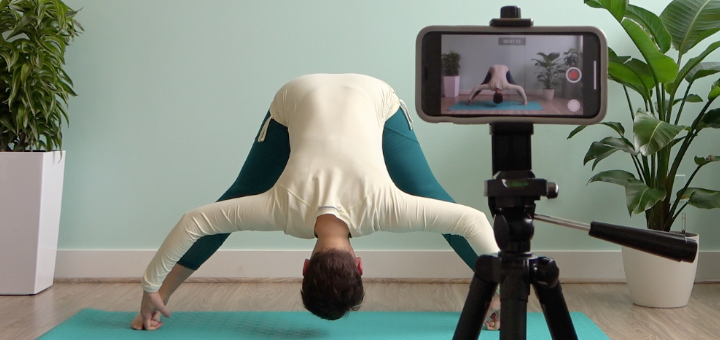
Step 1. Prepare to record your video
The basic equipment that’s required for recording yoga videos is your mobile phone and a tripod to hold it. Other things you need to consider are:
- Content. Make sure that your class will be useful to your students right now, so that they are motivated to purchase it.
- Lighting. It is best if you position your mat across from a bright window without any windows behind you.
- Background. Keep your background clutter-free and as ambient as possible.
- Distance. Make sure that your camera is far enough from your mat so that your whole body fits into the picture, whether you are standing with arms up or lying on the floor in a twist.
- Attire. Make sure that your clothes are not too baggy, so that your students can see what you are doing with your body. The clothes shouldn’t be too revealing at the bust line, in the arm holes, or in the mid-section, it shouldn’t gape or slide over your head when you do Downward Facing Dog or a similar pose. Busy prints don’t look good on camera, and I find that dark colors in the darker room can look and feel depressing. Consider what kind of mood you are trying to create for your students, as a lot of people are naturally sensitive to color.
- Sound. There are three main ways of recording sound: live narration of the practice, prerecorded sound and after-the-fact voiceover.
- Live narration is when you teach the class as you go, just like you would normally do in a live class. The problem is that your students might not be able to hear you when you are upside down or turn away from the camera. To make this work, you would need to get an external wireless microphone to connect to your camera. Another concern that rules this method out for me personally, is the natural huffing and puffing that happens when you move and talk at the same time. Not everybody wants to listen to the breathing sounds of the teacher. But, if your practice is not very strenuous, this might work for you.
- Prerecorded sound means recording narration for the practice ahead of time in a quiet place (walk-in closet works great!) to one of your devices (phone, laptop or tablet) using GarageBand (on Apple devices ) or Sound Recorder (on PCs) or a similar app. That way you end up with very clean and high-quality sound (especially if you have an external microphone). You can also record yourself with built-in Voice Memos app on your phone. During the video recording, you just play the sound of the practice and follow along with it. At the video editing stage, you would replace the audio track from your video with the audio track from your original audio recording. Keep in mind that you would need two separate devices for this arrangement – one to play the sound when you record your video, and another one for recording your video. This has been my preferred method of recording videos for many years.
- After-the-fact voiceover is similar to what they do in movies. You record the video of the practice first without any instructions and then add instructional narration during editing. I have found that this method takes much longer than any other. When you do your own yoga practice, you usually move too fast to fit proper instructions in after the fact. So you end up struggling during the editing stage because you either have to talk very fast, or cut out important details, or try to edit the video to fit all the instructions in – and this takes a long time. Personally, I find it difficult to narrate the practice while it’s happening on the screen, so I only do it for very short practices that involve mostly breathing and meditation, when timing is not that much of an issue.
Step 2. Record your practice
Step 3. Edit your practice
After you record your practice, you will need to edit it with iMovie (Apple) or a similar alternative for PC. If your recording went well, all you need to do is cut off the very beginning of your recording, when you turn your camera on and get down on your mat (and maybe replace it with a screen with your logo and the name of the practice), and the very end, when you turn your camera off. You would then replace your audio file (if you are using sound methods 2 or 3) and then export your video into .mp4 format to have it ready for posting on YouTube or Vimeo.
If the recording didn’t go smoothly, you might have to edit parts where you coughed, or had to fix your clothes, or made a mistake in your narration or movement. Of course, you can get very creative with your video and play with effects and titles, just remember that all that takes a lot of time.
Step 4. Upload your video
After you export your video, you will need to load it to your YouTube or Vimeo account. Both services allow you to make your video “private” so that only people who have access to the private link can view it.
Step 5. Create Buy Now button
After you post your video, go to your PayPal account and create a Buy Now button that people can use to purchase this practice. Assign a price (be reasonable about it) and copy button code.
Step 6. Email your students
Create an email for your students with some useful tips that relate to the video, and an offer to purchase your practice video. Be frank with your students about needing income to get you through this uncertain time and describe your process for selling the practice (they purchase it first, then you send them the link to the practice). Add the code for Buy Now button from PayPal.
Step 7. Send an email with private link to your practice
Once you get a notification from PayPal that someone had purchased your practice, send them an email with the private link to your practice. Later, check in with the same student to see how they liked the video and if they have any requests for other practices.
You might be wondering – there is an abundance of free and paid yoga classes available online – why would people buy from me? They would buy it because of YOU – because they like you, trust you and want your reassuring presence in their lives. Don’t try to be like anybody else, and don’t try to compete with other yoga online platforms that do this professionally. Of course, you will not have the same polished product or the same breadth of reach. But you have you, your individual teaching style, the way you connect to your students, how you comfort them when they need it. Lean into your strengths, do your thing and make sure that your entire mailing list knows what you now offer. Stay in touch with them, announce new classes, offer them sequences for home practice and do other things to maintain that connection. Next week we will talk about other strategies that you can use to cultivate the connection with your current students and to broaden your reach–tune in!
[jetpack_subscription_form]






Thank you so much, Olga, for giving out so generously with all these tips that you gained over the years. I always admired your generosity with the information ever since I started to follow your blog. It feels ever so more important to trying keep connecting to my students in times like this…
Thank you so much Olga!
Thank you so much Olga. I started recording my videos last week and I’ve been using the voiceover method. Just as you pointed out, there are parts where I’ve had to miss instructions or dropped behind because my video-self is too fast. I’m going to try the prerecorded sound version next – fingers crossed!
Thank you!
Thank you very helpful.
Thanks i have started recently, valuable points ?
this was really helpful, thank you!