5 other ways to avoid benefits of yoga poses (release valves part 2)
16Few weeks ago I wrote a post about the so-called “release valves” in yoga – unfortunate movement or holding patterns that our bodies fall into out of habit or to avoid working certain areas. I was amazed by all the positive response that I got, and the question that came up most often was – “Is that a comprehensive list?” It wasn’t, and today we will discuss five other release valves that are quite common and can prevent you from getting the full benefits of yoga poses. Here they are.
1. Funky arm rotation in overhead position.
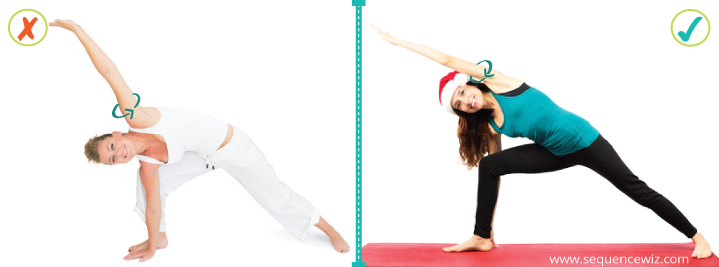
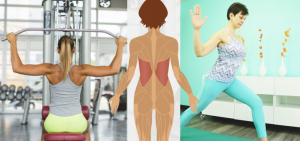
If you bring your arm overhead in any yoga pose (it is especially common in side bends and Downward Dog) and your armpit is sticking out, it means that you are potentially jamming your shoulder joint. Look at this picture:
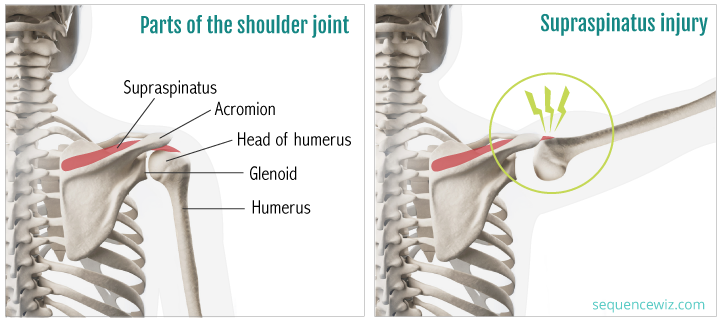
If you keep your arms facing down when you move them past the shoulder height, you are risking the two bones running into each other and pinching the supraspinatus muscle between them. This is one of the sources of rotator cuff injury (read more about it here).
SOLUTION. Turn your arm(s) in, so that your elbow creases are facing your head and your shoulder blade(s) move away from the center. 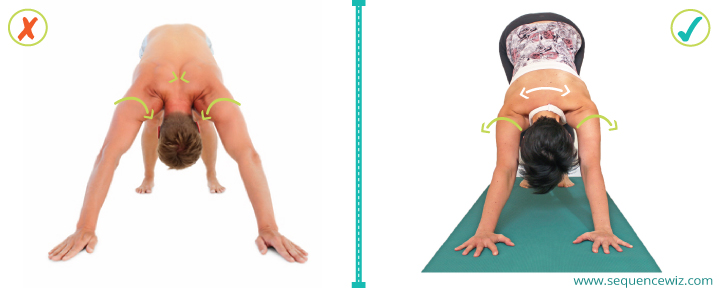
And please remember – you cannot judge the position of your shoulder by the position of your hand. You can easily turn your forearm without rotating your shoulder, but it is the shoulder rotation that we are after.
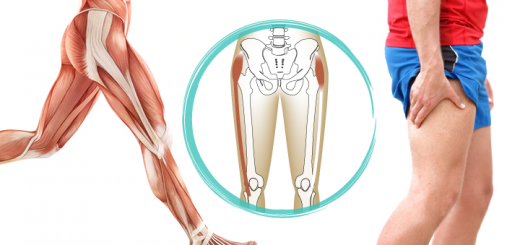
2. Droopy knee.
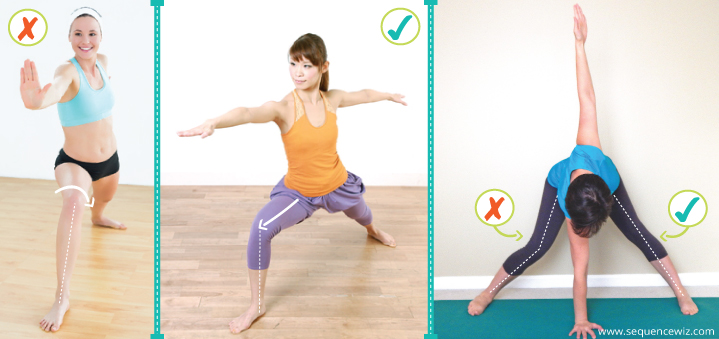
Your knee is a hinge joint, which means that it can only move one way, just like a hinge, no rotation or side movement allowed. To ensure that, you have ligaments on both sides of the knee (inner and outer) that stabilize it. It means that any time you bend your knee during the yoga practice, it shouldn’t droop in or out in relation to your ankle, otherwise you can strain those ligaments. You know how the athletes can “blow the knee out”? It usually means that the knee was hit from the side, and it buckled sideways injuring those ligaments. Nobody is hitting your knee in a yoga class, of course, but if you consistently droop it in or out (usually in), you are doing the same sort of damage. This often happens if your hip is not ready for a pose (like Warrior 1) and refuses to rotate – the knee will try to pick up the slack.
SOLUTION. Keep an eye on where the knee is going. Prepare your hips better before attempting the poses that can be compromising for the knee. Use props (examples below).
3. Leveraging yourself with arms in poses.
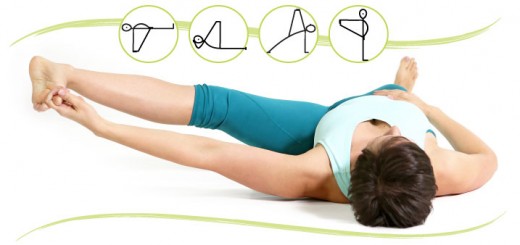
This often happens in twists and back bends, like Cobra pose. When you use the strength of your upper body to push yourself into the pose, you are both missing out on the effect of the pose and can injure your shoulders or your back, and create neck/shoulder tension. For example, in a supine twist (above), if you insist on pulling the shoulder down toward the ground, you can strain the front of the shoulder.
In Cobra pose, pushing with your arms stresses your lower back at the pivot point; instead of distributing the curve throughout your back and strengthening it, you are creating a vulnerable spot and weakening your back (the shoulders and neck will be suffering also).
SOLUTION. Use appropriate muscles for the appropriate task. In back bends, distribute the curve throughout the entire back to strengthen it. In twists, initiate the movement with progressive abdominal contraction so that the twist begins in the center of the body. Which brings me to the next point.
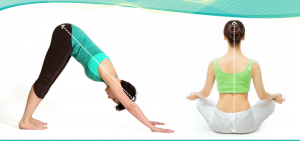
4. Spending too much time on the limbs and forgetting about the spine.
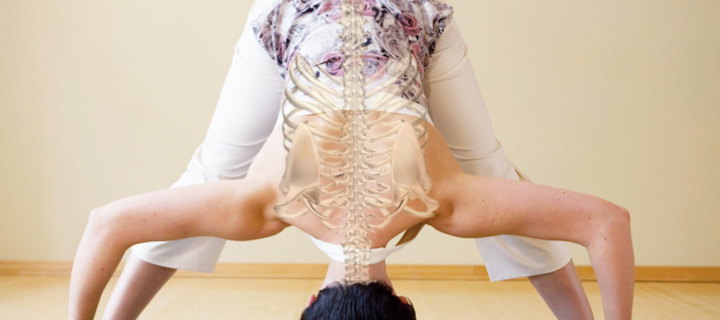
The ultimate purpose of any yoga pose is integration – teaching different body parts how to work together. That is why any yoga pose needs to begin at the center. Since the spine is the structural center of the body, we need to first concern ourselves with what the spine is doing. Is it supposed to bend forward or sideways in this pose? Is it supposed to twist? When you have clarity on what your spine is doing, many other small details fall into place. The actions of the periphery (limbs) always support and enhance what you do with your spine.
SOLUTION. Make sure that you are clear on what your spine is supposed to do in any yoga pose. Ask your teacher, educate yourself. If you know that you are bending forward in a pose, you will know HOW to do it, because all forward bends are done in the same way for similar reasons. Over the next few months we will spend a lot of time discussing forward bends, back bends, lateral bends and twists to give you an idea of how to do them safely and what kind of benefits we can expect from them. Subscribe to this blog if you are interested!
5. Forgetting to breathe.
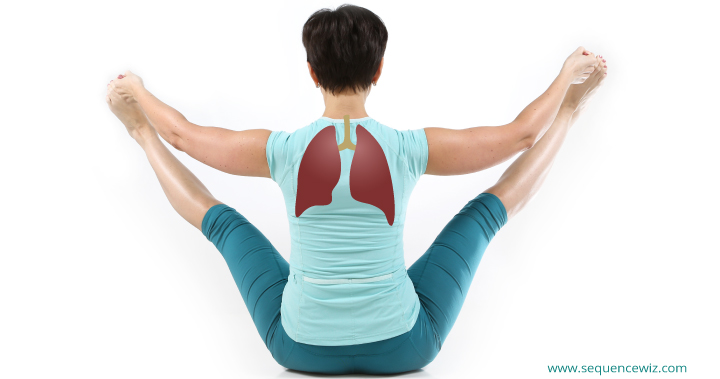
Well, technically, you cannot forget to breathe, your body will take care of that for you (thank goodness; can you imagine if we had to think about every single breath we take?!). But often we become so focused on arranging our bodies in space and then hold on for dear life as we maintain the pose, that breathing is the last thing on our minds. Bad idea. If you cannot breathe deeply while holding a pose (any pose), you should get out of that pose immediately. Breathing is what brings the pose to life, it oxygenates your blood that helps carry the waste out of your muscles (if you are into the western way of looking at things); it is the pump that moves the energy into every nook and cranny of your system (if you are into the eastern way of looking at things). The bottom line is – you are not doing yoga if you are not breathing deeply in poses.
SOLUTION. It is simple, yet it is hard – breathe! Begin your practice by deepening your breath and carry that pattern throughout.
We have to be on the lookout for those release valves all the time, but it also helps you stay focused on your practice instead of thinking about other things.
Next time we will debunk some myths that circulate out there about yoga poses and their effectiveness, and discuss what yoga poses can and cannot do. Tune in!
[jetpack_subscription_form]






Thank you Olga! I am always excited when I receive notification on my email about your new post! Thanks for simplicity and clarity! Your fan, Sandra 🙂
Thank you Sandra; that warms my heart 🙂
I love this, you are so clear and so helpful. Thank you!
Thank you Debbie, so happy that you like it!
very helpful information. thanks for doing this.
Thank you Donna! I am glad to hear that you found it useful.
Great article, Olga! Thank you very much for sharing. I notice in my classes many droopy knees in poses as warrior II, and I encourage my students to adapt the feet position in order to get the knee in one line with the foot and hip. Now, in warrior II, the hip is more open than in warrior I.
I consider the warrior positions as important positions to work on especially for students with less yoga experience – as you refer to warrior I when mentioning that the hip might not be ready, do you have any suggestions to prepare the hip for warrior poses?
And another question: In the section of “Leveraging yourself with arms in the pose” I understand the main point in the supine twist. However, I prefer leaving the shoulder on the floor, reducing the twist instead of having the shoulder getting up in order to get with the knees on the floor. Could you please clarify that point?
Hi Stefanie, thank you for your comment! To your questions: I don’t think one needs any particular hip-knee preparation for Warrior 1, but for Warrior 2 I think it’s really useful. In Warrior 2 the front hip is in flexion/external rotation, so any sort of external rotation would help. Even circling one’s knees while lying on the back might work, or some sort or Tree work. One maneuver that I use sometimes: Lie on the back in Supta Baddha Konasana. Inhale: Slide the feet down (with knees open) until the legs straighten Exhale: Start bending the knees, but move the feet wide apart. Then return into Baddha Konasana and continue like that. You and up drawing small circles with your feet on the floor. Good for coordination, too. I completely agree with you on the Supine twist. You can EITHER keep the shoulder on the floor and limit the range of the twist, OR Keep the knees stacked and not twist as far, so your shoulder ends up hanging (but then you have to keep your arm on your hip, not the floor to protect the shoulder).
Thank you very much, Olga! Great points.
Namaste Olga, I am so grateful for your teachings. Completing my 200 hour YTT this Sunday and having a burning desire to teach, I am also acutely aware of the harm we can bring through improper alignment. I learn so so much from you, again, much gratitude.
I am looking for an answer to “what are the benefits of the yoga exercise called “the pump”?…
It is straight leg raising while lying on our back.
Recently I realize that it has decreased the heaviness in my lower body. I would like to know how it does that.
Hi Olga
Each time I read any of your new articles, I dig back into your wonderfully written older ones, which all stay very relevant. Thanks so much for reinforcing in such simple and logical ways, all that I am on-teaching my students and of course myself.
I have recently completed a Yin Yoga Teachers Training here in Perth WA (an additional string to my Yoga Teacher’s qualification bow achieved about 10 years ago) and am so excited with how it has opened up my yoga world even further, and yet so beautifully continues to intertwine with my existing yoga experiences of 35 or more years. Please, when you have a spare moment (probably not too often!), I would be interested to know how you feel about Yin Yoga – to me, it seems a very logical way of combining the yogas and bringing yoga to back to it’s origins of finding a quiet and comfortable place to meditate. I know you are very much into the logic of how yoga works for us.
Hoping this finds you well and happy
Namaste
Robin (female)
Hi Robin! Thank you for your lovely comment. I don’t have much experience with Yin yoga, so I am not the right person to comment on it 🙂 Generally I very much appreciate getting into a meditative, quiet space with yoga, as long as it doesn’t lead to overstretching. In our yoga practice we are constantly striving to find balance between flexibility and stability, so we do not want to overdo one at the expense of the other. So as long as the structure is not destabilized, going deep can provide profound relief. And, or course, deep conscious breathing is what takes us deep within, more then any advance posture. Hope this makes sense!
I always read a post by you in the subway on the way to class and make it a point to teach at least something from it. Thank you, you are my mobile library!
🙂 That’s great to hear!
First time seeing the website and read a lot of helpful information.